Setting up the Siemens S7 PLC on the Demo Rack

SIA Connect uses connectors to correctly read the data from specific communication protocols. These connectors have already been installed on the SIA Connect unit mounted on the Demo Rack. Alongside the connectors for the two PLC's, the SIA Connect unit will also come with connectors for cloud communication; Rest API, MQTT, and Azure
Setting up the Siemens instance
Setting up an instance is an easy task, which is quickly done by following this guide
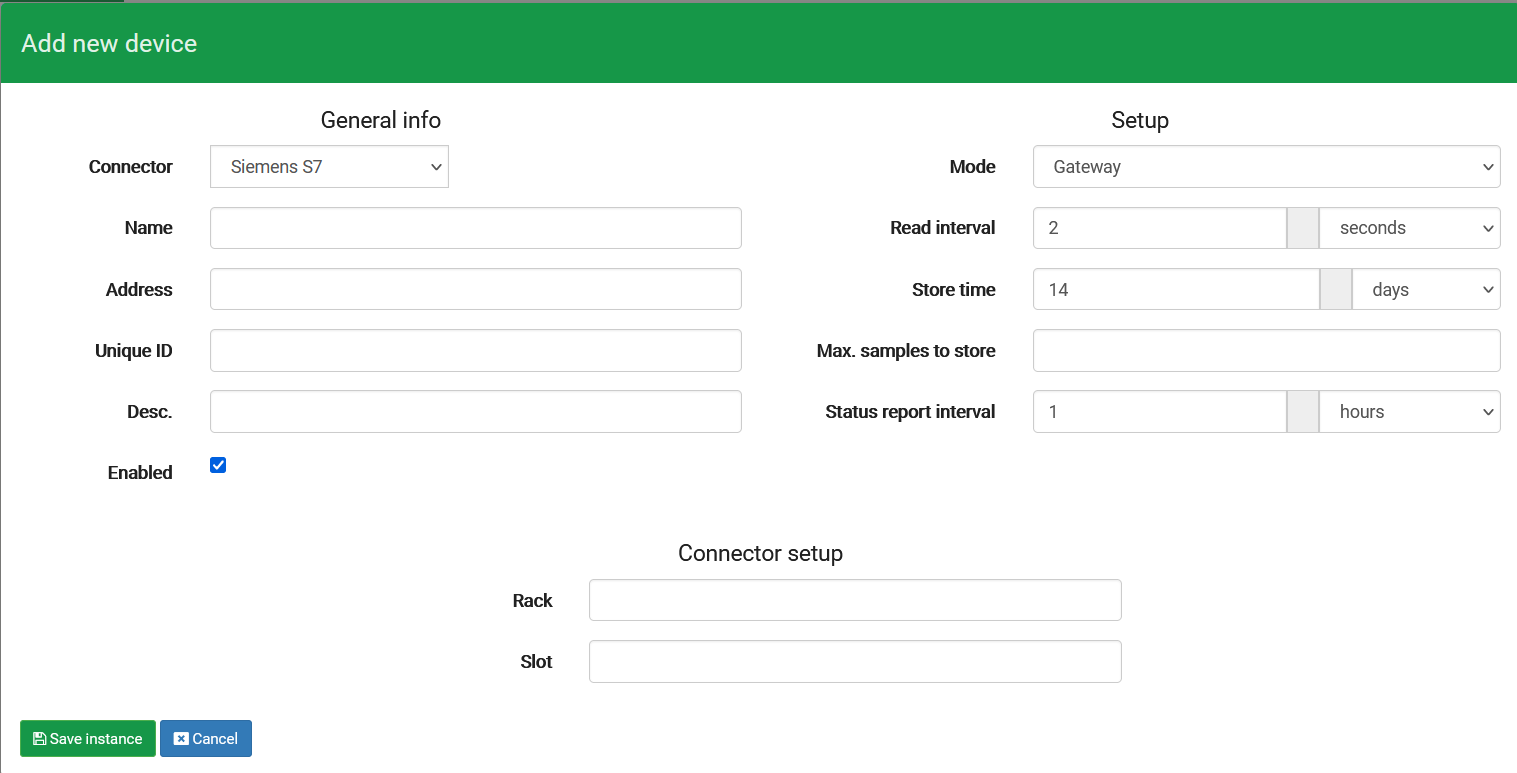
| Name | Input | Function |
|---|---|---|
| Connector | Siemens S7 | The connector used for the instance. Different PLC's and other functions inside SIA Connect will need different connectors |
| Name | Your chosen name of the instance | This is the name of the instance, which can be anything you'd like |
| Address | 10.20.30.10 | The IP-Address of the PLC |
| Unique ID | Leave empty | This can be used when you have many instances with the same or similar name. |
| Desc. | Leave empty | A field where you can describe the instance |
| Rack | 0 | The Rack of the PLC. With S7-1200 PLC's this is usually set to either 0 or 1 |
| Slot | 0 | The Slot of the PLC. With S7-1200 PLC's this is usually 0 |
Setting up the Siemens items
When the instance has been set up, we can start setting up the items. A detailed guide on how to do so can be found here
The table below shows all the tags inside the Siemens PLC alongside the information needed to properly set up the item inside SIA Connect
| Name | Data type | Address | Function description | Read/Write |
|---|---|---|---|---|
| Hz | Real | DB2.DBD2 | Shows the current Hz output, where 0 Hz is standstill and 50 Hz is the maximum output of the motor | Read |
| RPM | Int | DB2.DBW6 | Shows the current RPM output of the motor, where 0 RPM is standstill and 1500 RPM is the maximum output of the motor | Read |
| RampUp | Int | DB2.DBW12 | This is the ramp up time in seconds. The ramp is how quickly it will reach the setpoint from standstill | Read/Write |
| RampDown | Int | DB2.DBW18 | This is the ramp down time in seconds. The ramp down is how quickly it will reach a standstill from the current speed | Read/Write |
| I/O | Bool | DB2.DBX24 | This is the switch to turn the motor on or off I/O = 0: The motor is off I/O = 1: The motor is on |
Read/Write |
| RPM_SP | Int | DB2.DBW26 | This is the setpoint for the motor speed in RPM Min: 0 Max: 1500 |
Read/Write |
| Percentage_Current | Real | DB2.DBD28 | The output of the motor in percentage, scaled between the lowest and highest possible value (0-1500) | Read |
| RPM_Percentage_Choose | Bool | DB2.DBX32 | A switch to choose whether you want to use RPM or percentage as your setpoint 0: Use RPM as the setpoint 1: Use percentage as the setpoint |
Read/Write |
| Percentage_SP | Real | DB2.DBD34 | The setpoint in percentage. Can be changed if the "RPM_Percentage_Choose" is set to 1. If not, it will still scale based on the RPM setpoint, but cannot be changed | Read/Write |
| Test_String | String | DB7.DBB2-X Longer strings need higher X-values |
This is to test the String functionality and is not connected to anything inside the program. | Read/Write |
Using the program
When you have set up the items, you can use the program to simulate data by changing the values from the SIA Connect interface

- Set whether you want percentage or RPM as your setpoint
- Set the SP for either percentage or RPM, depending on what you chose in the previous step
- Set the desired ramp times, both ramp up and ramp down - these can be different from each other
- Change I/O from 0 to 1 to start the simulator
- You will see the RPM, Hz, and current percentage change as the motor ramps up
- After your chosen ramp up time has elapsed, you will see the motor data staying stable at the setpoint
- Change I/O from 1 to 0 to turn the motor off
- After the ramp down time has elapsed, the motor data should read 0