Initial setup of the Demo Rack

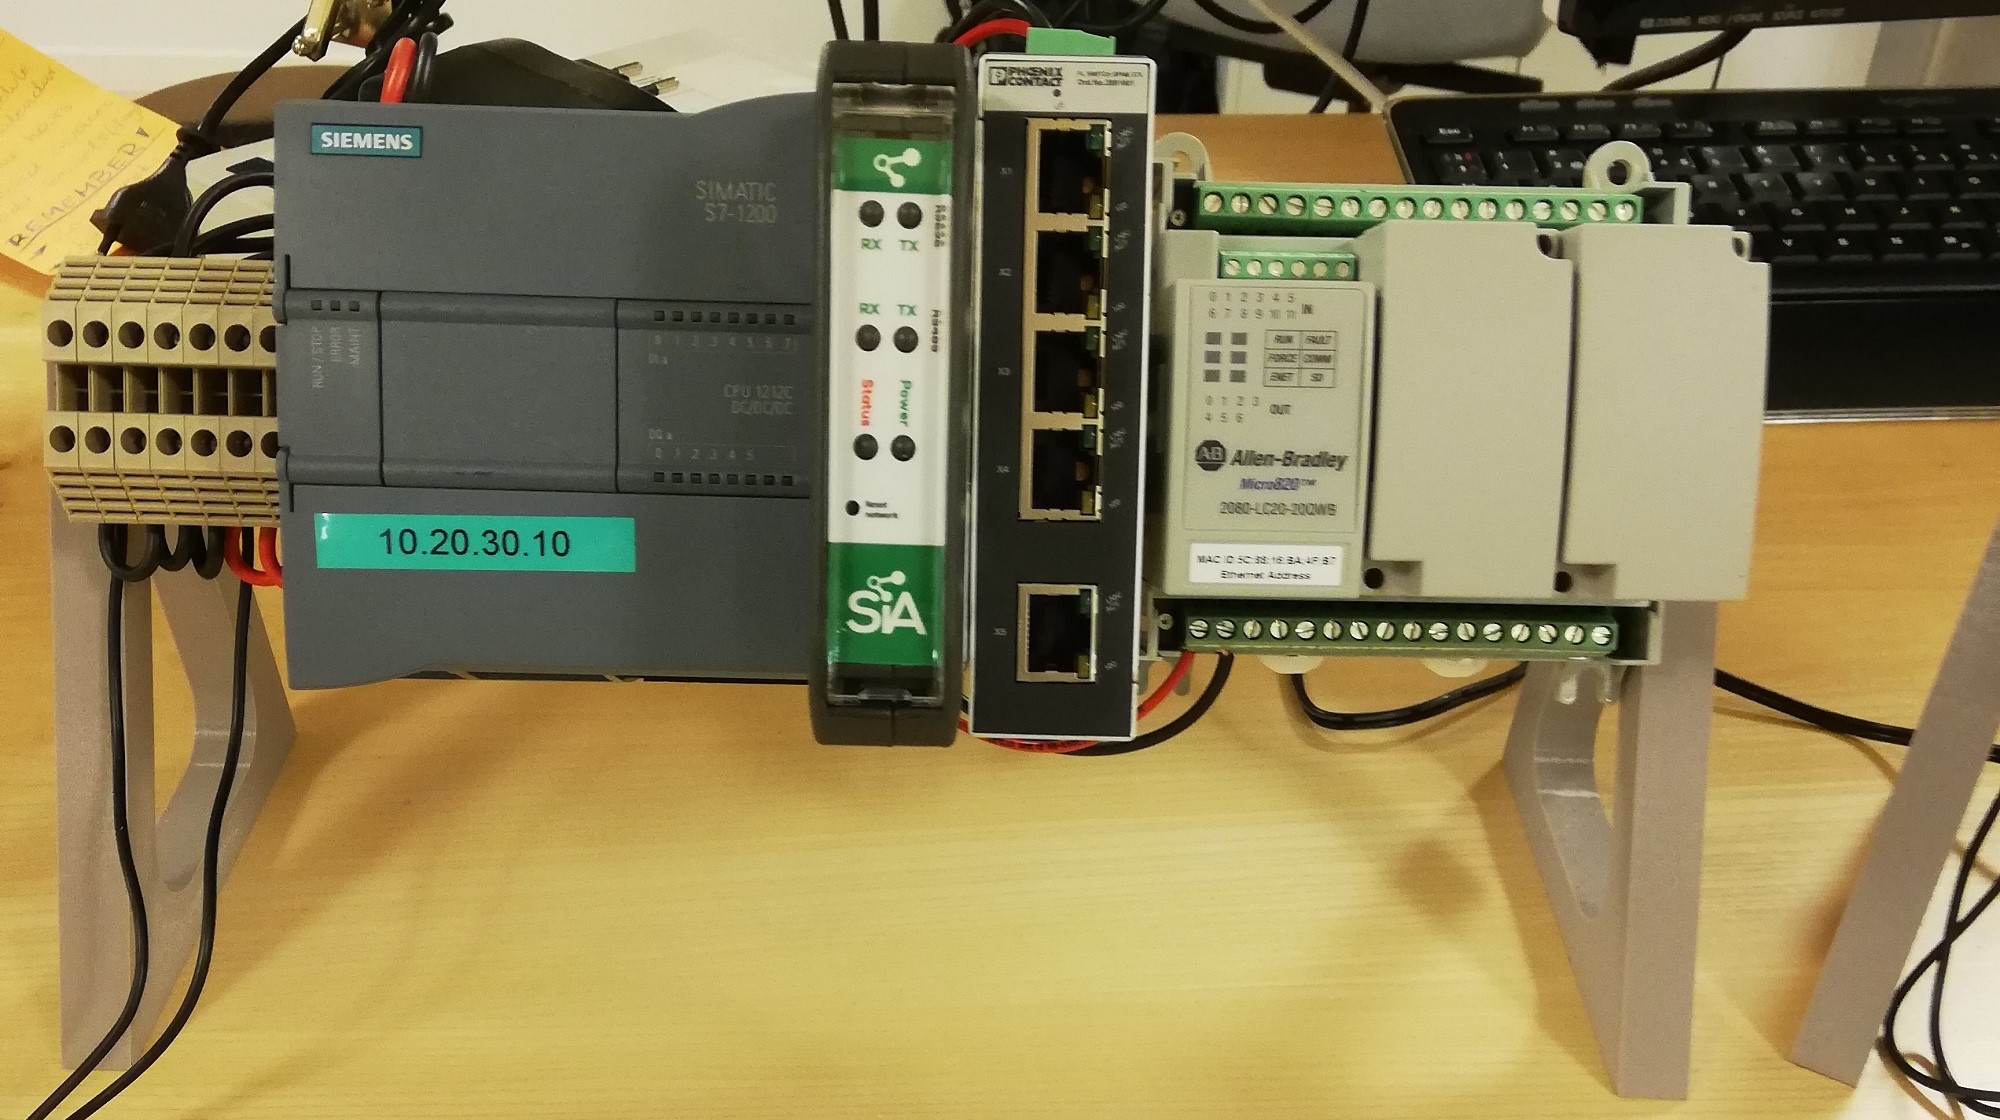
Contents of the Demo Rack
The Demo Rack contains a DIN-Rail where the following things are included:
- 1x SIA Connect unit
- 1x Siemens S7-1200 PLC with a program to simulate motor control
- 1x Allen Bradley Micro820 PLC with an empty tag list
- 1x Switch
- 1x 230VAC to 24VDC power supply
- 3x Ethernet cables
Setting up the Demo Rack
- Connect the two PLC's and the SIA Connect unit to the switch
Keep in mind to use the X1 port on SIA Connect. For information on how to find X1, follow this guide - Connect the power supply to an outlet
- Connect your PC to the switch with an Ethernet cable
- Make sure your PC has a static IP-Address in the same subnet as the SIA Connect unit (10.20.30.xx)
Logging into SIA Connect
When the steps above have been completed, follow these steps:
- With your PC connected to the switch alongside the other units, open a browser and input the IP-Address for SIA Connect (10.20.30.40)

- On the log in screen, as seen below, input the username and password
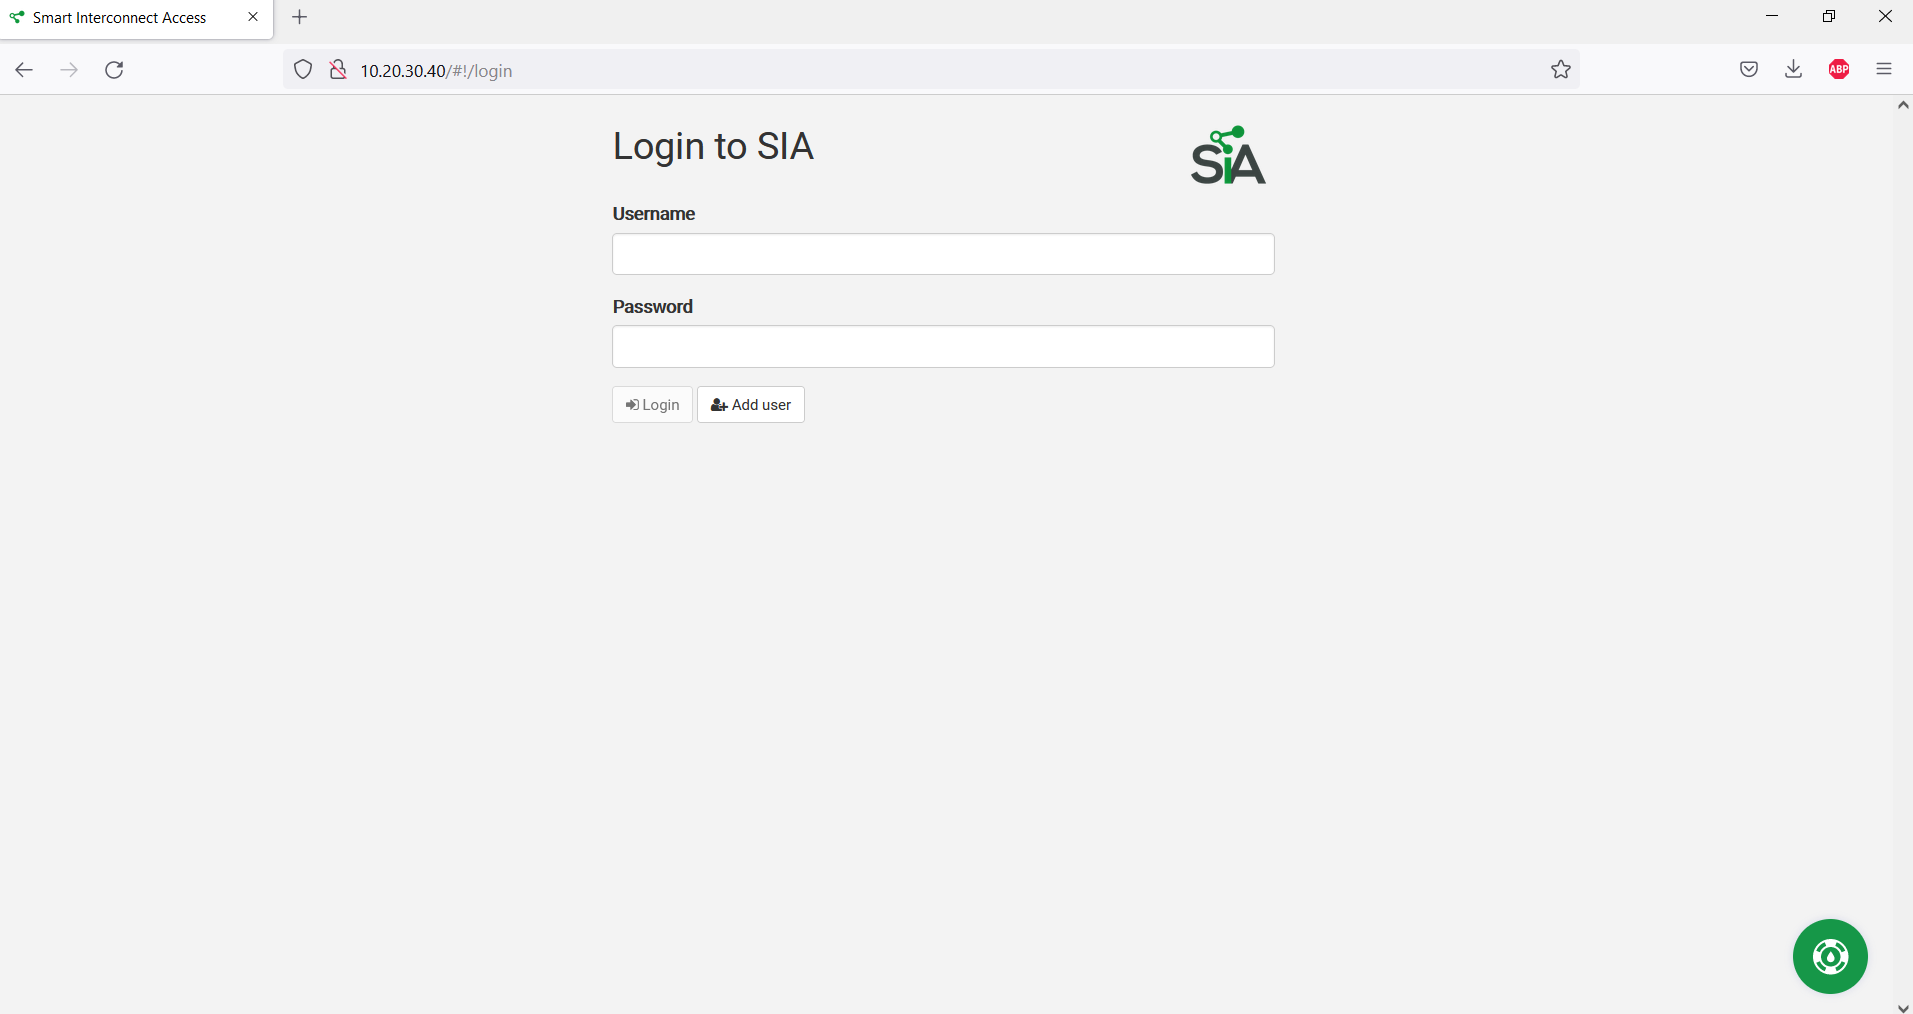 Username: Demo
Password: demo1234
To add another user, follow this guide
- You are now logged into SIA and can start working on the devices