Connecting PLCs to AVEVA Insight

Table of Contents
Adding the Data SourceAdding endpointDefining message formats for publishing dataMapping data from the PLCs to AVEVA InsightValidate the data exchangeData from edge devices such as PLCs, meters, controllers and much more can be transmitted to AVEVA Insight using SIA Connect. In order to achieve the first that needs to be done is Setting up AVEVA Insight for communication by preparing a data source and the backend.
This article will show to setting up SIA Connect for the communication to AVEVA Insight and expand on the following:
- Setting up an Instance for your SIA Connect device to connect to AVEVA Insight
- Setting up an Item for publishing data to AVEVA Insight
- Setting up a Mapping to publish data from a PLC into AVEVA Insight using SIA Connect
- Verifying that data is being published from a PLC into AVEVA Insight
Adding the Data Source
The first step is to create an Instance to establish the connection between SIA Connect and AVEVA Insight.
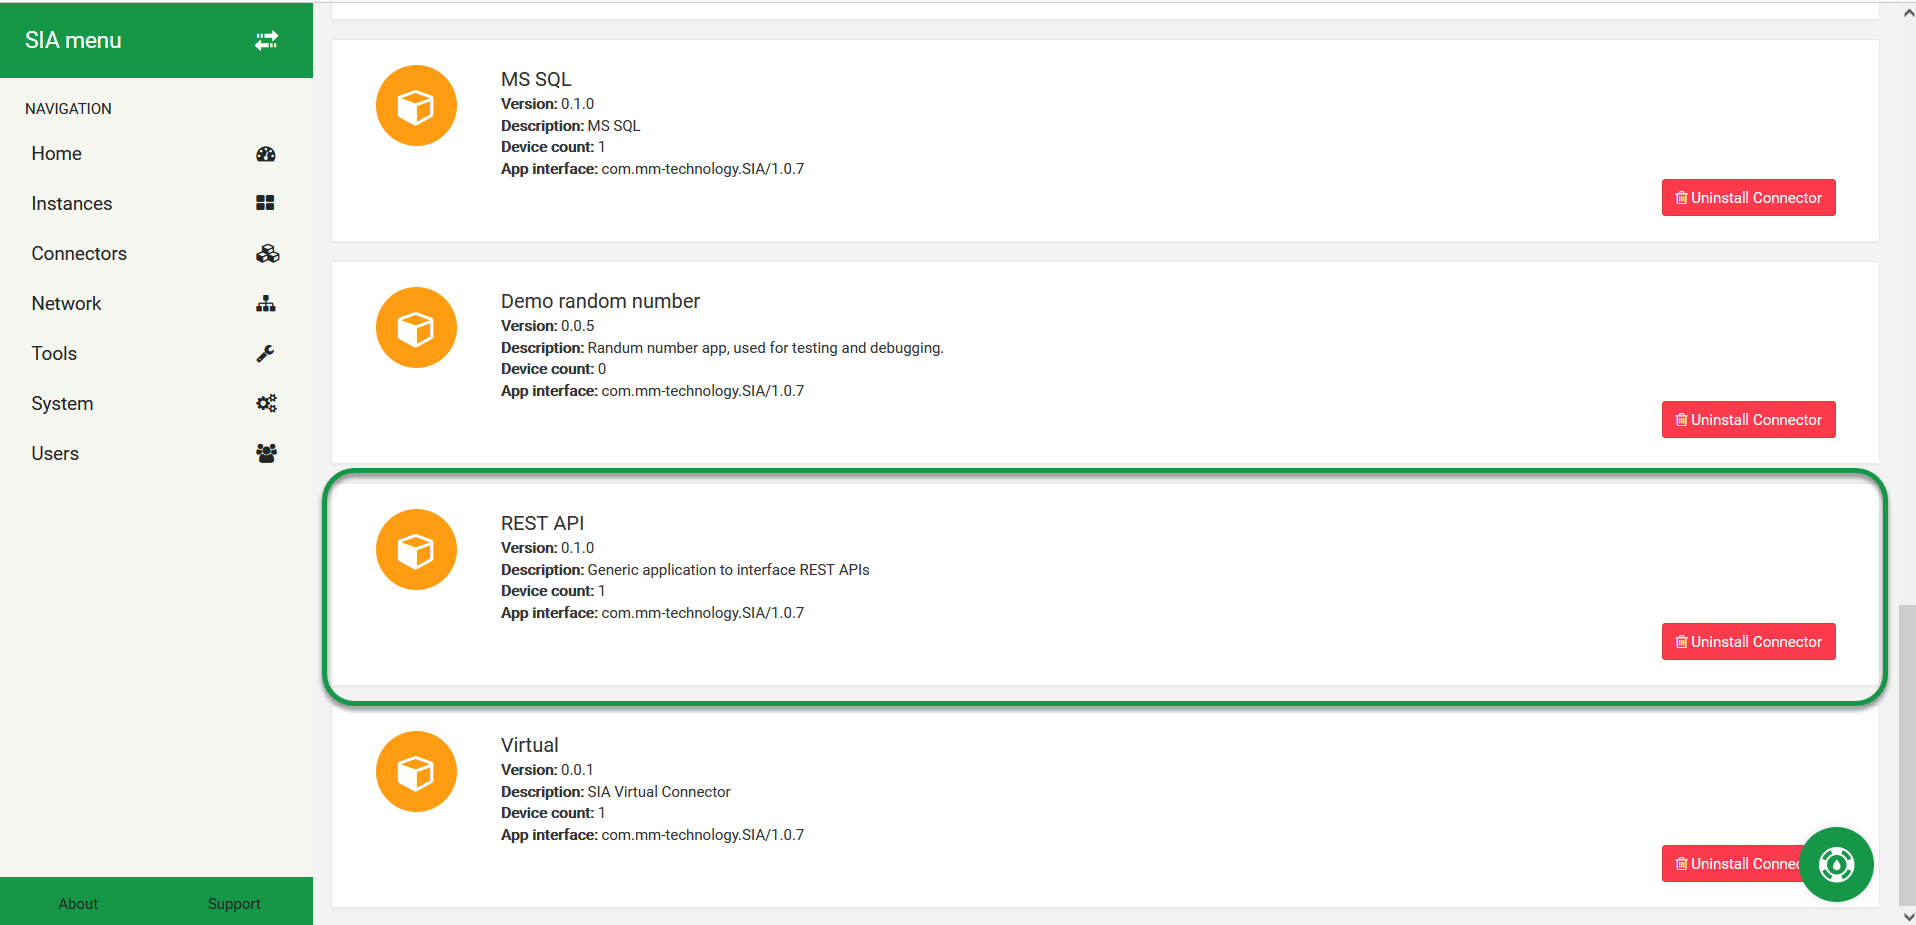
First you need to make sure you have REST API Connector installed
To connect your SIA Connect device to AVEVA Insight, you will need to create an Instance
An Instance is a representation of your integrations, both with physical devices and various databases
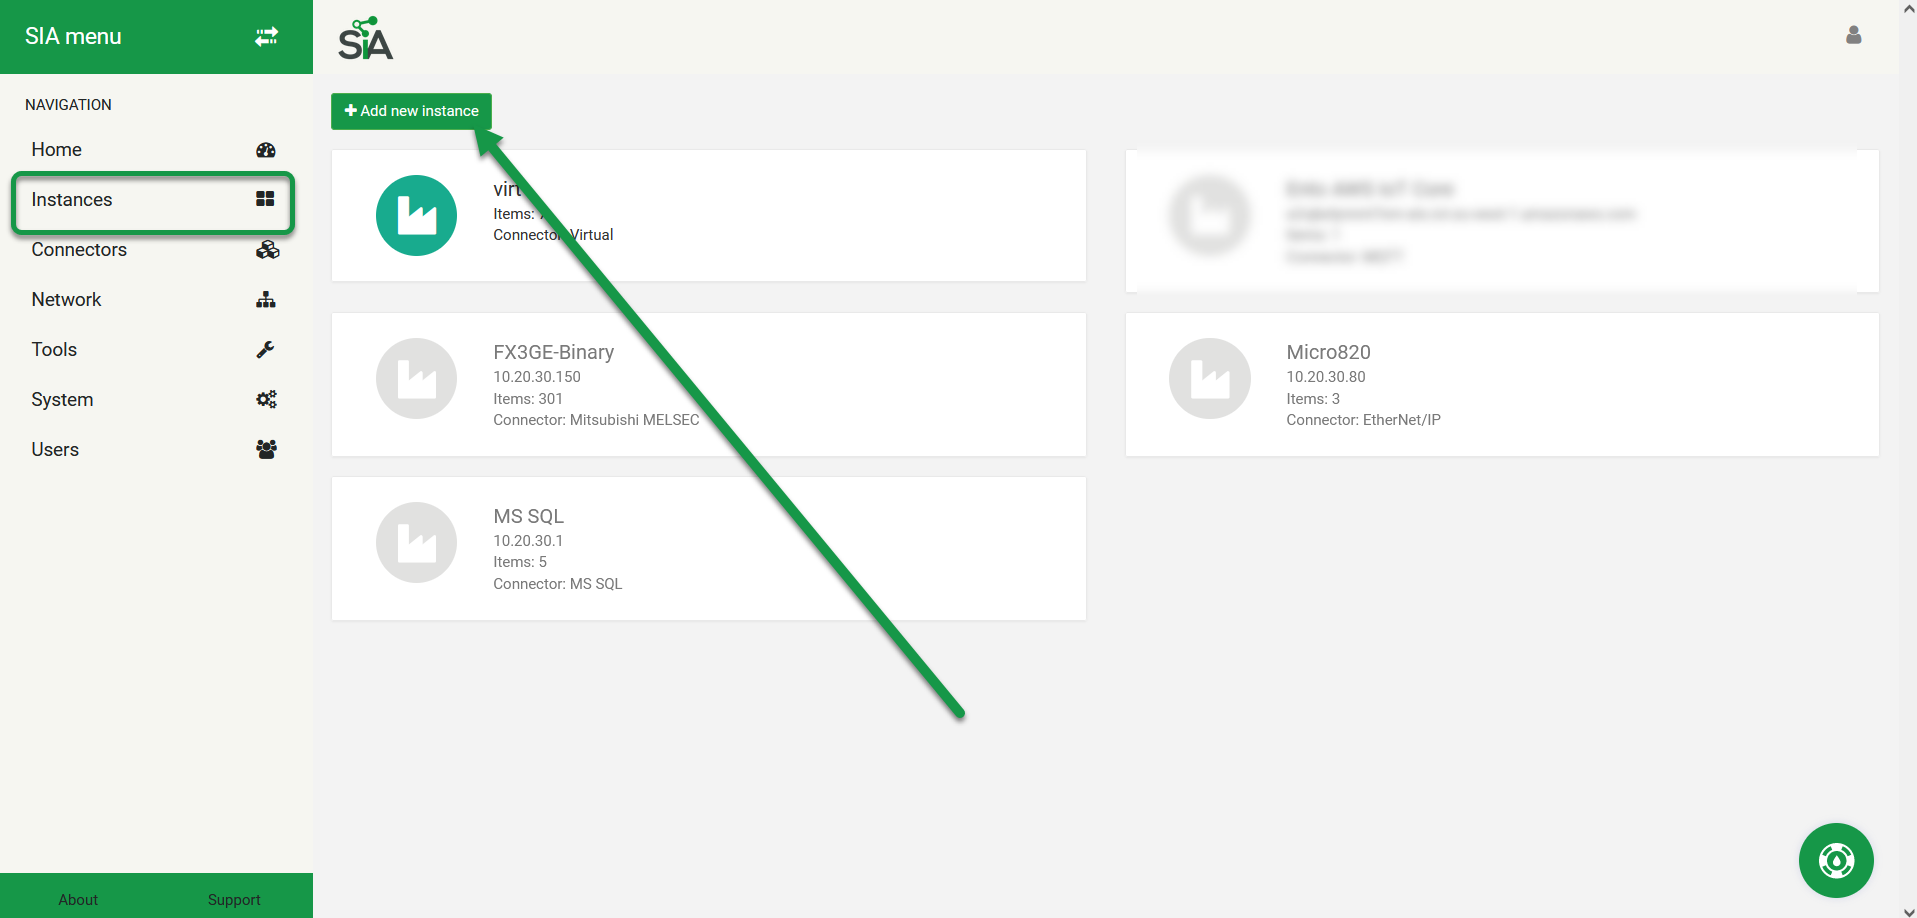
Create a new Instance for AVEVA Insight:
- Navigate to Instances
- Clicking Add new Instance
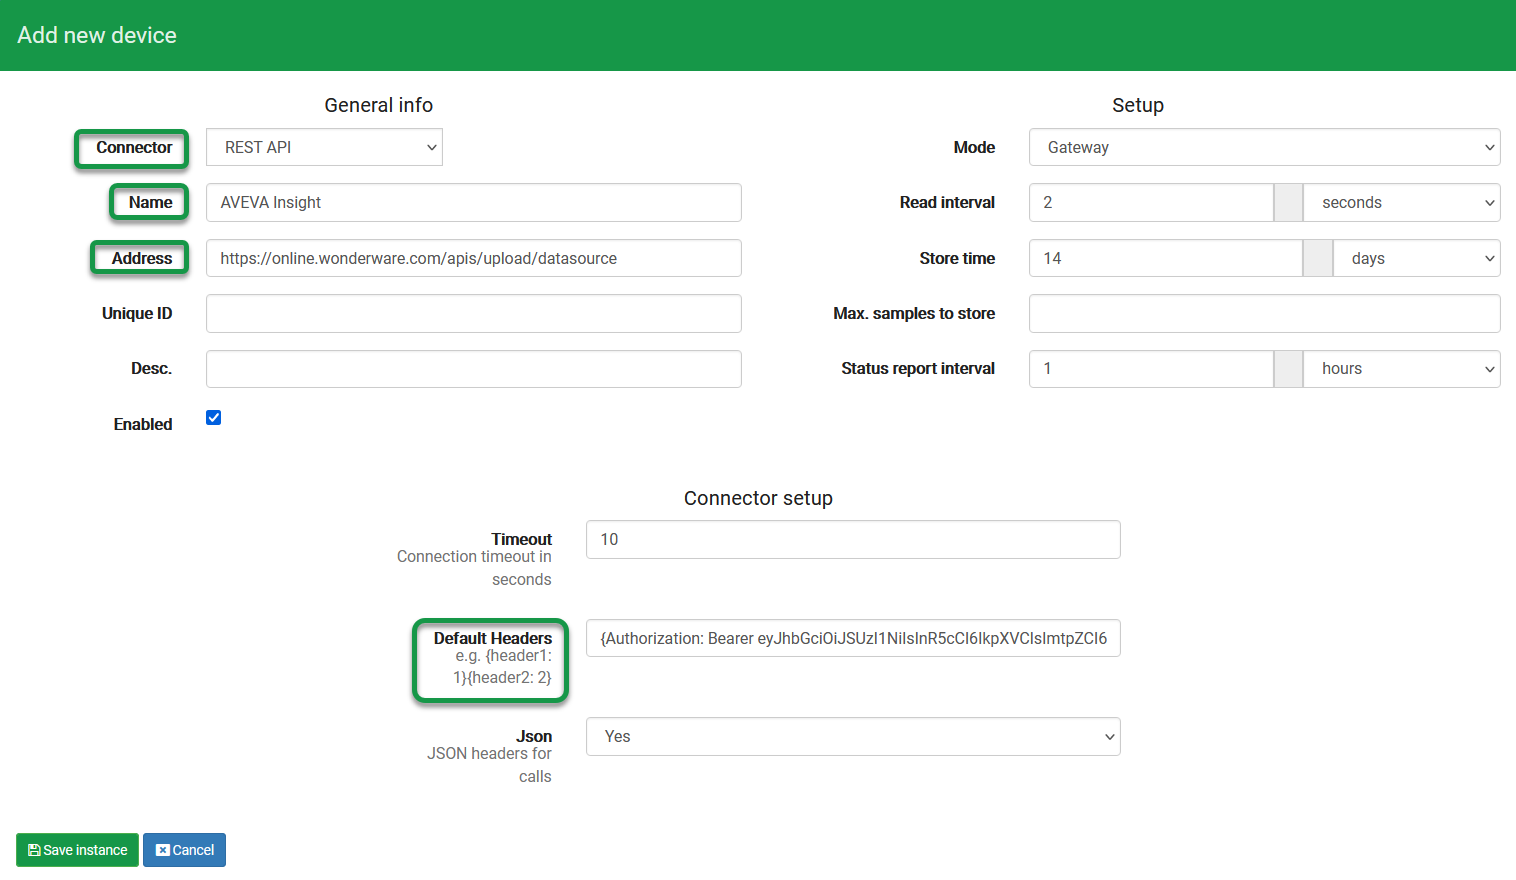
- Setup the instance with details as below
In the dialog opened from previous step, parameters needed to be input to be able to connect to AVEVA Insight as follow:
| Parameter | Description |
|---|---|
| Connector |
REST API The protocol being used for your connection |
| Name |
Any name you want This is solely for the purpose of distinguishing your various instances |
| Address |
https://online.wonderware.com/apis/upload/datasource The Endpoint for your connection. This is found using the previous guide |
| Default Headers |
{Authorization: [Your token] } This token is generated by your AVEVA Insight Data Source and is needed for authorizing your connection. The token is found using the previous guide |
Adding endpoint
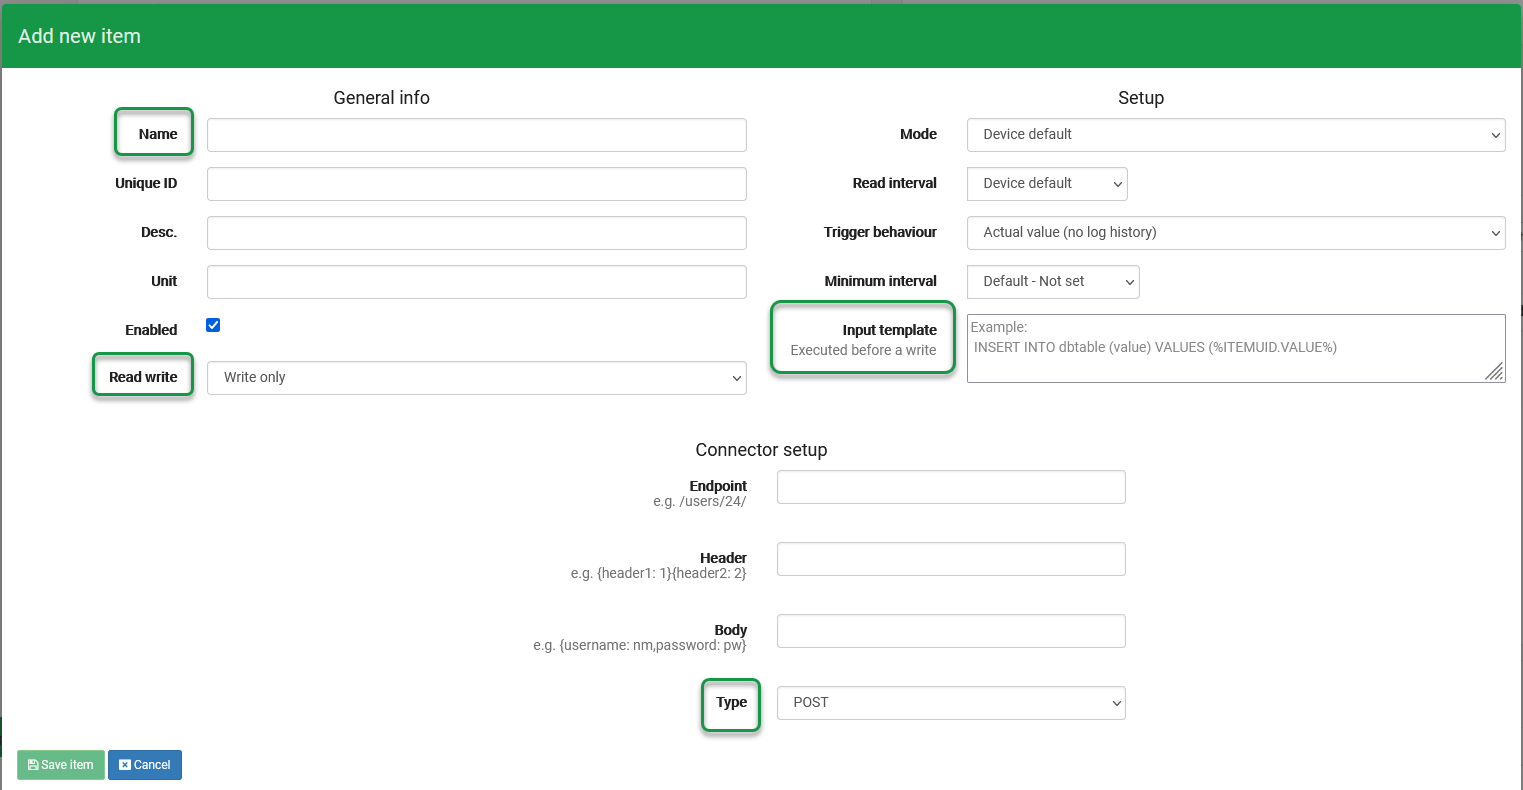
In order for your SIA Connect device to publish data into AVEVA Insight, you will need to create an Item that will send that data to the data source by using its backend endpoint.
- Go the created Instance created in previous step
- Click Add new Item
- Input with parameters as below
| Parameter | Description |
|---|---|
| Name |
Any name you want This is solely for the purpose of distinguishing your various items |
| Read write |
Write only This will allow the item to either read, write, or both from the endpoint. We select Write only, as AVEVA Insight does not allow reading from this endpoint |
| Input template |
{
    "data": [
        {
            "DateTime": "%VALUE.TIME%",
            "%ITEM.NAME%": %VALUE%
        }
    ]
}
For more details see section the section about defining message formats for AVEVA Insight.This will create user-defined data surrounding the value of the item. As AVEVA Insight requires a specific format, we will need to specify the data being sent |
| Type |
POST This will define the API function being used by the item. In this case we use POST, as we are using the item for sending data to AVEVA Insight. |
Defining message formats for publishing data
Since AVEVA Insight requires the user to send messages in a specific format, we will need to define the messages being sent from SIA Connect to AVEVA Insight. Without this step, the data being sent from SIA Connect will not be accepted by AVEVA Insight.
In order to define and customize the payloads that are being published, the Input template for the item can be set.
Below we can see the format required by AVEVA Insight:
{
    "data": [
        {
            "DateTime": "<value>",
            "<TagName>": <value>,
            "<TagName>": <value>,
            "<TagName>": <value>,
            "<TagName>": <value>,
        }
    ]
}
Below we see an example on how to define your input template to fit with the format required by AVEVA Insight:
| Message format example (Input template) | Result |
|---|---|
{
  "data": [
    {
    "DateTime": "%VALUE.TIME%",
    "%ITEM.NAME%": %VALUE%
    }
  ]
}
|
{
    "data": [
    {
    "DateTime": "2022-02-03T07:47:26",
    "Test_Item": 123
    }
  ]
} |
For a full reference of the available variables and parameters please refer to System variables, Instance variables and Item variables.
That's it. We are now ready to begin mapping data from a PLC to AVEVA Insight
Mapping data from the PLCs to AVEVA Insight
SIA Connect is able to read data from almost any PLC. This is done by creating an instance and setting the PLC up withing that instance. If you need help in doing so, our help-page contains various guides for creating instances for the specific PLC you want to use
For a PLC to transfer data to AVEVA Insight, you must use Mappings. Mappings is a SIA Connect feature where you can transfer data from one Instance to another. In this case we have two instances, a PLC and AVEVA Insight
As Master item select the instance and item which masters when to transmit data. In this example we select Siemens S7 PLC and its item named Test_Item. As Slave item select the AVEVA Insight instance and the desired Item. In this example it is instance named AVEVA Insight and item named Publish.
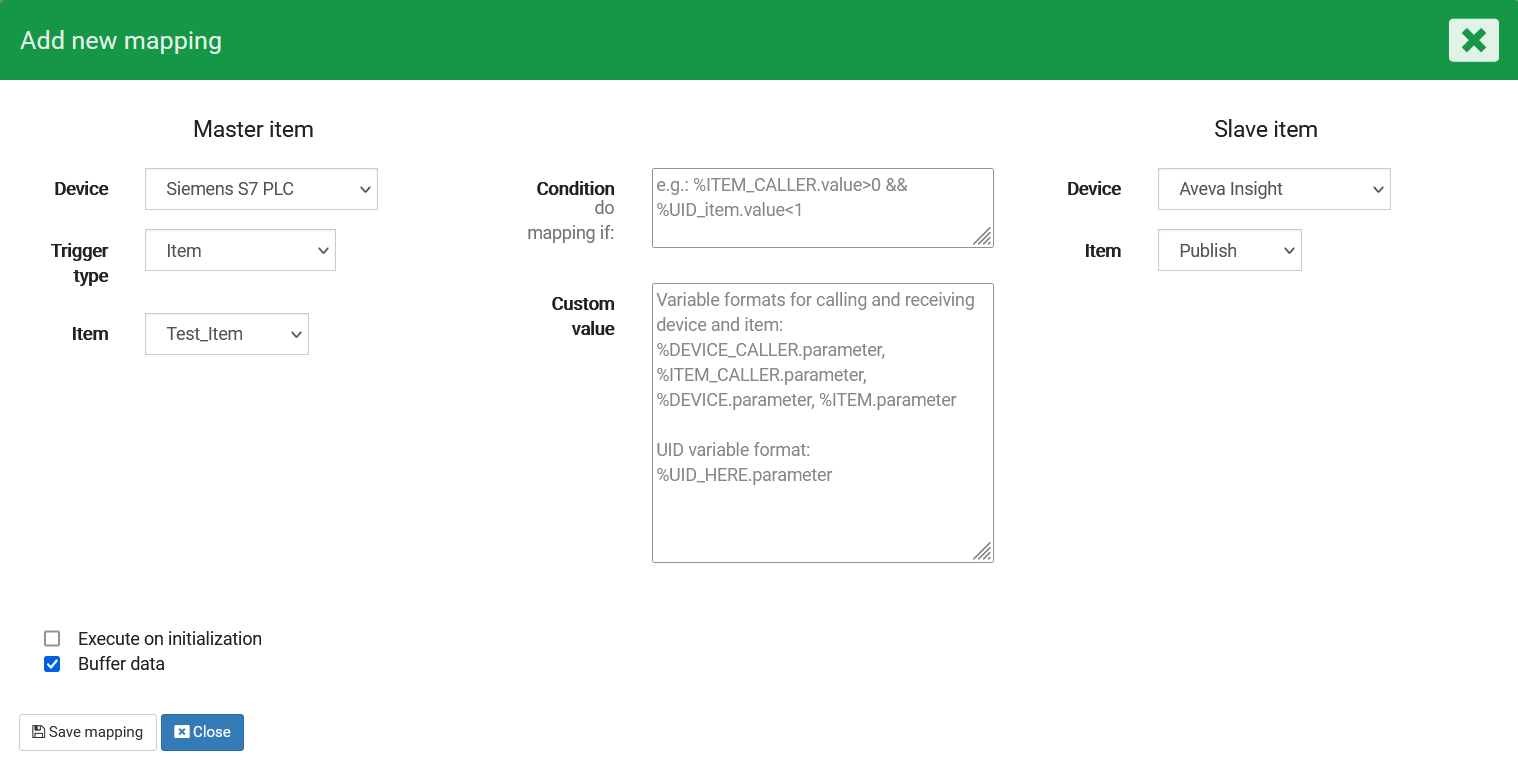 In the above picture we can see how the Mapping interface looks
Data from the Siemens S7 PLC from the Test_Item is now being published to the AVEVA Insight item named Publish. Continue this step with all the data items which you desire to publish to AVEVA Insight.
Validate the data exchange
Any data being published to AVEVA Insight can be viewed from within their platform.
We can find our data by following these steps:
- Navigate to AVEVA Insight Suite (Located in the top right corner)
- Select AVEVA Insight
- Click the Search Bar
- Select the Data Points you want to read (Or click Add All)
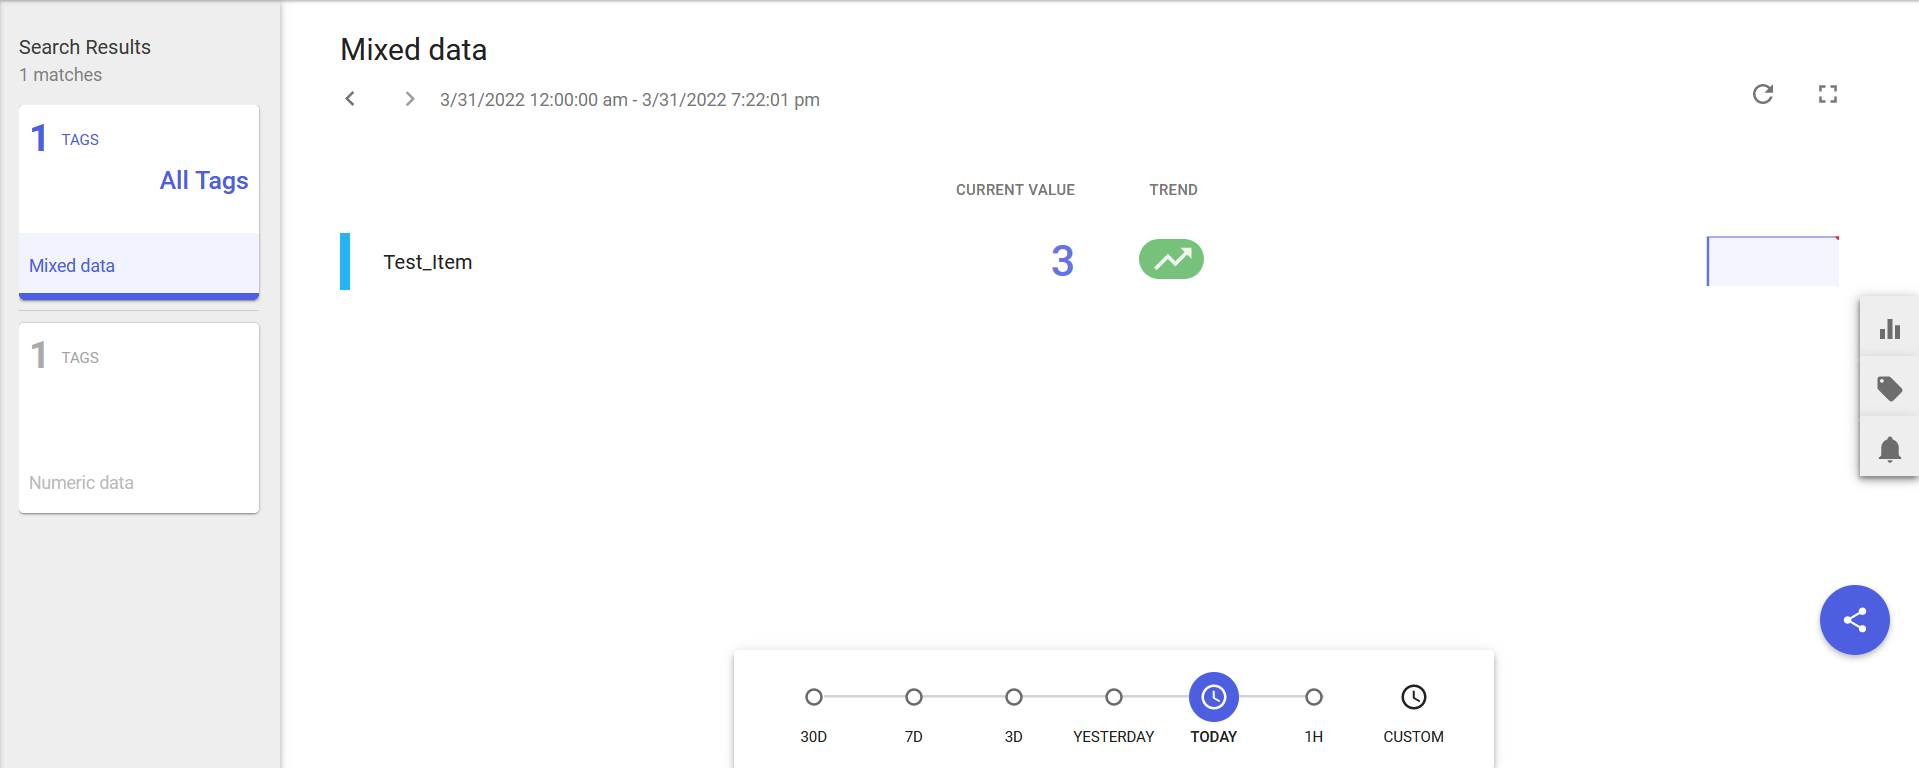
Following the steps above, you arrive at this screen. Here we can see the data published from your SIA Connect device to AVEVA Insight.